Spring MVC: form handling vol. 5 – select, option, options tags

Drop-down lists are the one of the most frequent elements in web forms. In HTML you can create such control using appropriate tags: < form:select > – parent tag of drop-down list and < form:option > – child tag of < form:select > tag. Spring MVC tag library has its own solution for the drop-down lists. In this post I will write about < form:select >, < form:option >, and < form:options > tags.
In the previous articles about form handling using Spring MVC I have made an overview of cases when we need to bind text field, check-boxes or radio buttons with a java object. Almost all steps will be repeated for the select drop-down list element.
Further I will examine three situations with drop-down lists in context of binding it with java object using Spring MVC tag library. The first case will be about form:select tag with values based on java.util.Map, the second example will be about usage of form:select tag in conjunction with form:option tags, the third example will be about usage of form:select tag in conjunction with form:options tag.
Every example will have the same result jsp page, so only the form pages will be different and controllers for them. Setup of configuration will be omitted because it was explained in the one of previous articles.
Spring MVC select tag
Let’s assume that user of web application can select a producer of mobile phone (e.g. HTC, SAMSUNG, IPHONE etc). We can implement this in several ways using the Spring MVC form tag library.
Domain model:
public class Smartphone {

	private String phone;

	public String getPhone() {
		return phone;
	}

	public void setPhone(String phone) {
		this.phone = phone;
	}

}
This class will be binded to the forms.
SmartphoneController:
...
	@RequestMapping(value="/phone-page")
	private ModelAndView selectTag() {
		ModelAndView mav = new ModelAndView("phone-form");

		Map< String, String > phones = new HashMap<String, String>();
		phones.put("samsung", "SAMSUNG");
		phones.put("nokia", "NOKIA");
		phones.put("iphone", "IPHONE");

		mav.addObject("phonesMap", phones);
		mav.addObject("smartphone", new Smartphone());

		return mav;
	}

	@RequestMapping(value="/phone-result")
	private ModelAndView processPhone(@ModelAttribute Smartphone smartphone) {
		ModelAndView mav = new ModelAndView("phone-result");
		mav.addObject("smartphone", smartphone);
		return mav;
	}
...
In the selectTag() method I create a Map with values which will be displayed on page with drop-down. The second method processPhone(@ModelAttribute Smartphone smartphone) will be used as a shared end point for the all examples.
JSP for this example:
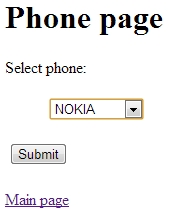
<h1>Phone page</h1>
Select phone:
<form:form method="POST" commandName="smartphone" action="phone-result.html">
<table>
    <tr>
    <td>
	    <ul>
	    	<form:select path="phone" items="${phonesMap}"/>
	    </ul>
    </td>
    </tr>
    <tr>
        <td>
            <input type="submit" value="Submit"/>
        </td>
    </tr>
</table>
</form:form>
That’s it
Spring MVC option tag
The second example will use hardcoded value of the < form:option > tag.
Controller:
...
	@RequestMapping(value="/phone-option-page")
	private ModelAndView optionTag() {
		return new ModelAndView("phone-option-form", "smartphone", new Smartphone());
	}
...
Pay attention to the JSP:
<body>
<h1>Phone page</h1>
Select phone:
<form:form method="POST" commandName="smartphone" action="phone-result.html">
<table>
    <tr>
    <td>
	    <ul>
	    	<form:select path="phone">
	    		<form:option value="samsung">SAMSUNG</form:option>
	    		<form:option value="nokia">NOKIA</form:option>
	    		<form:option selected="selected" value="htc">HTC</form:option>
	    		<form:option value="iphone">IPHONE</form:option>
	    	</form:select>
	    </ul>
    </td>
    </tr>
    <tr>
        <td>
            <input type="submit" value="Submit"/>
        </td>
    </tr>
</table>
</form:form>
Spring MVC options tag
The last example demonstrates how work with < form:options > tag.
Controller:
...
	@RequestMapping(value="/phone-options-page")
	private ModelAndView optionsTag() {
		ModelAndView mav = new ModelAndView("phone-options-form");

		Map< String, String > phones = new HashMap<String, String>();
		phones.put("samsung", "SAMSUNG");
		phones.put("nokia", "NOKIA");
		phones.put("iphone", "IPHONE");
		phones.put("bberry", "BLACKBERRY");
		phones.put("htc", "HTC");

		mav.addObject("phonesMap", phones);
		mav.addObject("smartphone", new Smartphone());

		return mav;
	}
...
And the appropriate JSP:
...
<h1>Phone page</h1>
Select phone:
<form:form method="POST" commandName="smartphone" action="phone-result.html">
<table>
    <tr>
    <td>
	    <ul>
	    	<form:select path="phone">
		    	<form:option value="-" label="--Select phone"/>
	            <form:options items="${phonesMap}" />
	    	</form:select>
	    </ul>
    </td>
    </tr>
    <tr>
        <td>
            <input type="submit" value="Submit"/>
        </td>
    </tr>
</table>
</form:form>
...
As specified in official Spring Documentation you can use any kind of java objects with appropriate getters and setters for the form:options tag:
The items attribute is typically populated with a collection or array of item objects. itemValue and itemLabel simply refer to bean properties of those item objects, if specified; otherwise, the item objects themselves will be stringified. Alternatively, you may specify a Map of items, in which case the map keys are interpreted as option values and the map values correspond to option labels. If itemValue and/or itemLabel happen to be specified as well, the item value property will apply to the map key and the item label property will apply to the map value.
Summary
Each of these examples is convenient in particular situation and should be used rationally. The < form:option > tag can be used in a small projects where you don’t need a big quantity of options, the < form:options > should be used when you store values of a drop-down in the database or when you need to generate the values in runtime. Source code of the tutorial you can find on GitHub.